Getting started
How To Guide
Everything you need to apply, measure, and care for your Lina nail art sets.
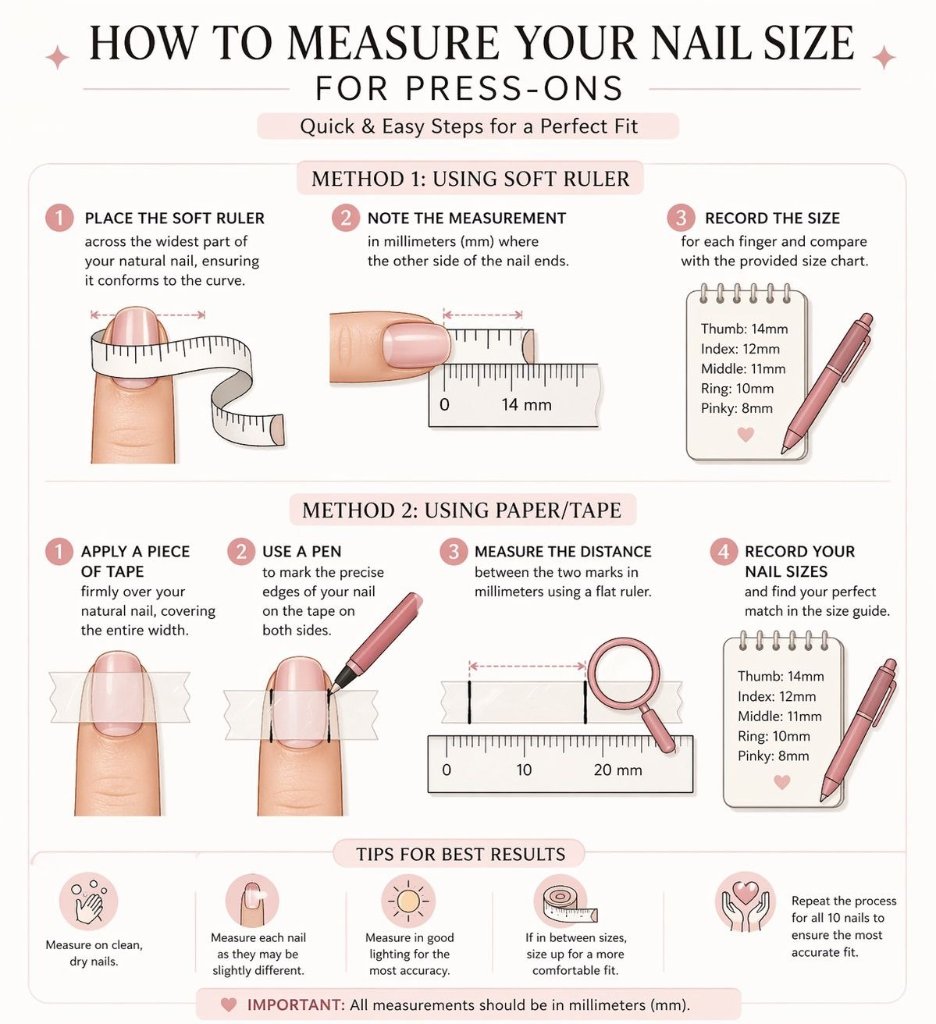
Step 1 — How to Measure
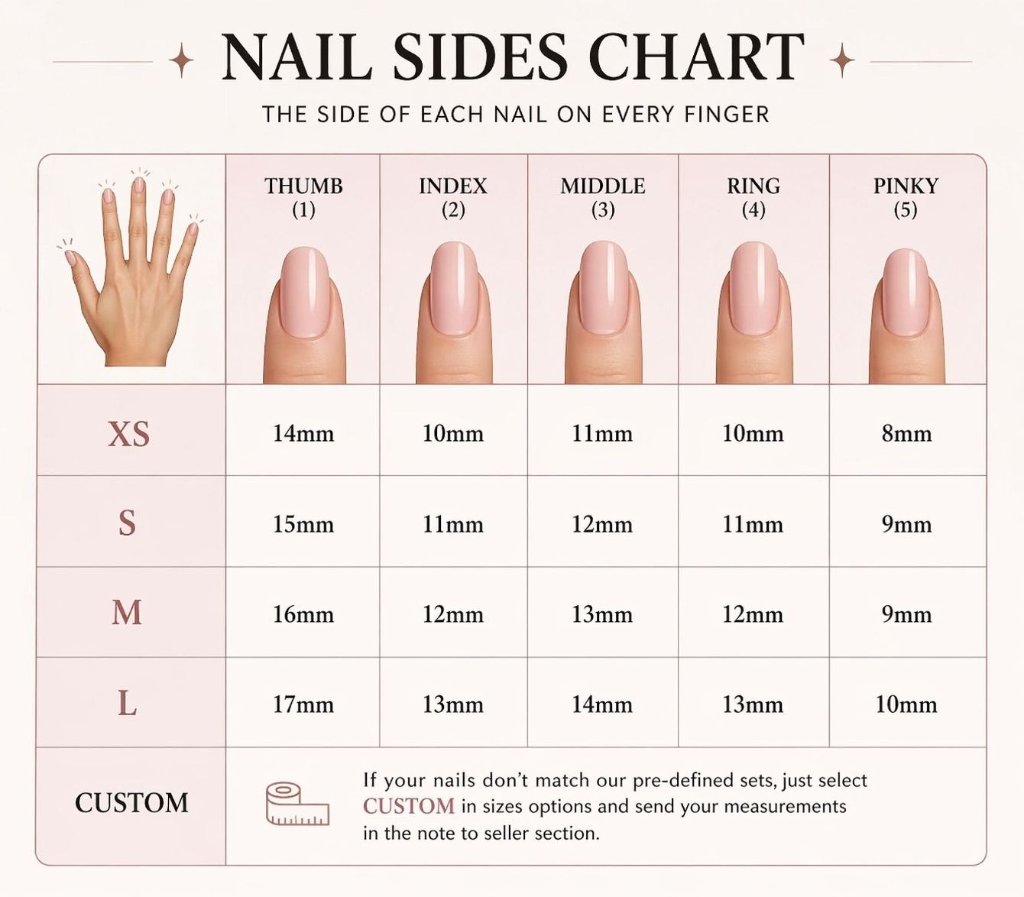
Step 2 — Find Your Size
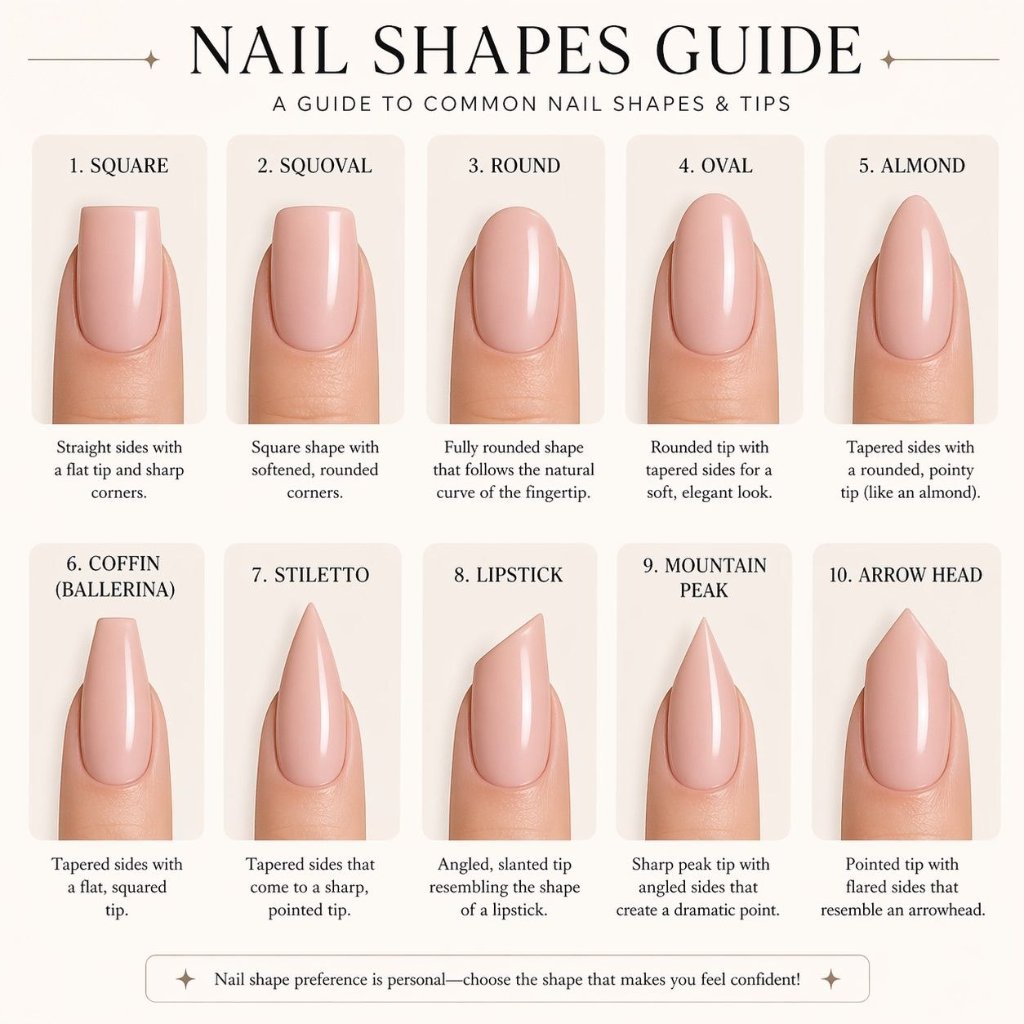
Step 3 — Choose Your Shape
Application Steps
Prep Your Nails
Clean your nails thoroughly and push back cuticles. Use an alcohol wipe to remove any oils — this is the most important step for longevity.
Find Your Size
Select the nail that best covers your natural nail without touching the skin on the sides. If between sizes, go bigger.
Apply Glue
Apply a small amount of nail glue to your natural nail. Press the press-on from the cuticle down, holding firmly for 10–15 seconds.
Seal the Edges
Run your finger along all edges to ensure full adhesion. Avoid water for at least 1 hour after application.
Removal
Soak in warm soapy water for 10–15 minutes. Gently lift from the side. Never force them off — this preserves your natural nail.
💡 Pro Tip: Applying a thin top coat over your press-ons extends wear to 2–3 weeks.
Alternatively — Scan Your Size
No ruler? No problem. Place your hand flat next to a credit card or gift card and upload a photo — our AI will estimate your nail size using the card as a reference.
Scan Your Size
Take two separate photos with a Canadian bank card (chip visible). First: your index, middle, ring, and pinky fingers. Second: your thumb separately (since it's often sideways). We'll use the chip as a precise scale reference.
Photo 1: Four Fingers
Photo 2: Thumb