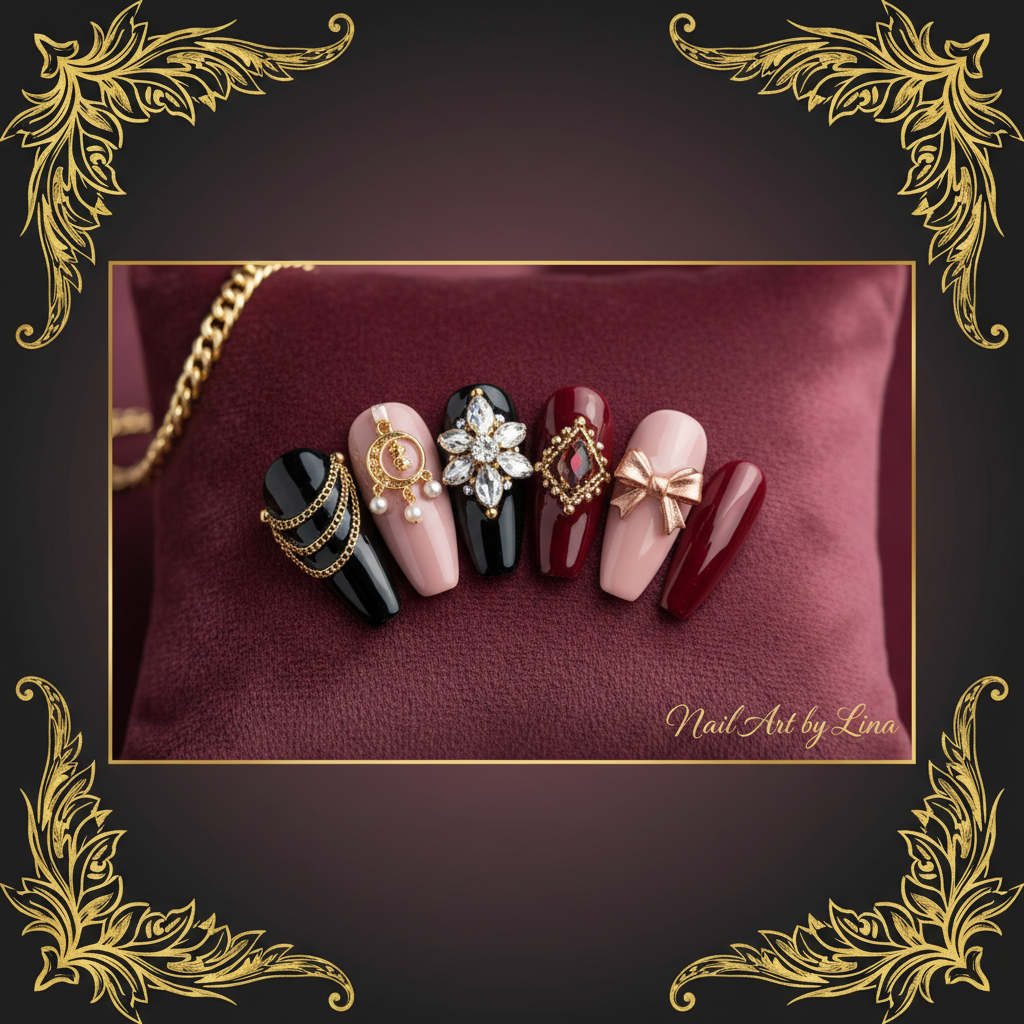
How to Add Jewels, Charms & Embellishments to Press-On Nails
From Swarovski crystals to gold chains — a step-by-step guide to adding embellishments to your press-on nails without ruining them.
How to Add Jewels, Charms & Embellishments to Press-On Nails
Embellishments are where nail art becomes truly theatrical. A perfectly placed Swarovski crystal can transform a beautiful nail into a breathtaking one. A tiny gold chain linking two nails? Pure drama.
But there's a right way and a very wrong way to add embellishments to press-on nails. Here's the complete guide.
What You'll Need
- Embellishments: rhinestones (Swarovski or similar), micro pearls, gold studs, nail charms, tiny chains
- Dotting tool or toothpick for placement
- Nail glue (gel nail glue works best for 3D items)
- Builder gel or clear gel (for larger, heavier pieces)
- UV lamp (if using gel adhesive)
- Tweezers for precision placement
- Top coat (for sealing flat embellishments)
Types of Embellishments and How to Apply Them
Rhinestones & Crystals
Best for: Accent nails, tips, geometric patterns, all-over crystal designs
- Apply a small amount of nail glue to the desired position on the nail
- Using a dotting tool (lightly dampened makes crystals stick to the tip), pick up the rhinestone and place it on the glue
- Press gently and hold for 5 seconds
- For large stones: use a small amount of builder gel instead of glue — it holds heavier items more securely
- Do not top coat over large 3D stones — it dulls the sparkle and doesn't add meaningful adhesion
Pro tip: Apply crystals before you put the press-on on your nail — working on a flat surface gives much better precision.
Micro Pearls & Caviar Beads
- Apply builder gel or gel top coat to the section of nail you want to cover
- Cure under UV lamp for 30 seconds (should be sticky/tacky, not fully cured)
- Press the nail surface into a small pile of pearls/beads, or apply them individually
- Seal with a final cure under UV lamp
Gold Foil & Chrome Powder
- Apply gel top coat over the nail
- Cure for 30 seconds — leave tacky
- Press foil sheet onto tacky surface, press firmly, peel back
- For chrome: use an eyeshadow applicator to rub chrome powder onto the tacky gel in circular motions
- Seal with a non-wipe gel top coat and fully cure
3D Elements (Flowers, Butterflies, Sculptural Pieces)
These are complex and ideally pre-built on the press-on before application.
- Build the 3D element using builder gel, layering and curing each section
- Paint/colour as desired
- Seal with UV top coat, leaving the sculptural elements exposed
For purchased 3D charms: use gel nail glue (UV type), apply to the base of the charm and the nail surface, cure together.
Nail Chains & Links
- Pierce a small hole at the edge of the nail tip before application (use a tiny nail drill or heated pin)
- Loop the chain through and secure with a crimp or knot
- Apply press-on to hand — the chain drapes naturally
Note: chains are dramatic but fragile. They're event nails, not everyday wear.
Sealing and Protecting Embellishments
- Flat rhinestones and foils: seal with top coat — apply carefully around the stone rather than over it for maximum sparkle
- 3D and raised elements: apply a ring of gel around the base of the element and cure — this acts like a moat that holds the piece in place
- All embellishments: avoid soaking and direct water pressure on embellished nails
Common Mistakes
Using too much glue — excess glue seeps around the stone and creates a cloudy mess
Applying over a slippery surface — always apply embellishments over a slightly tacky base (tacky gel works perfectly)
Choosing stones too large for the nail size — proportion matters. Tiny micro crystals on long almond nails; larger stones on shorter square nails
Forgetting to consider wearability — a nail you can't type on or button a shirt with is beautiful but impractical. Design for your lifestyle.
FAQ
What glue is best for rhinestones on nails? Gel nail glue (UV type) creates the strongest hold for heavy embellishments. Regular nail glue works for small, flat rhinestones.
How do I keep rhinestones from falling off? Apply them over a tacky gel base, press firmly, and seal the sides (not the top) with a ring of builder gel cured under UV.
Can I add embellishments to Lina's sets after purchase? Yes — the sets are finished art, but you can carefully add accent crystals if desired. Use a dotting tool and go slowly.
What's the most durable embellishment for everyday wear? Flat rhinestones sealed with gel top coat. Three-dimensional and sculptural elements are better for events and photos.
Frequently Asked Questions
What is the best adhesive for 3D nail embellishments?
UV gel nail glue is strongest for heavy or 3D items. Apply, press firmly, then cure under a UV lamp for a secure bond.
Should I apply embellishments before or after putting nails on?
Ideally before — working on a flat surface gives much better placement precision than trying to apply crystals to a curved nail on your hand.
How do I seal rhinestones without dulling the sparkle?
Apply top coat carefully around the base of the stone rather than directly over the top — this secures it without dulling the crystal surface.
Ready to wear your art?
Explore Lina's one-of-a-kind nail sets — each a wearable masterpiece.
Shop the Collection